Whether you are an old expert at seed stewardship or a new gardener with a budding curiosity, saving seeds from your home garden to grow and share can be one of the most rewarding experiences of the season.

This old-world skill is best learned experientially, and within a community of fellow seedpeople. But here are some tips to get you started, even if you only have a small garden.
Selection
Some plants are much easier for beginners. This has less to do with ease of harvest than with whether or not the plant needs a large or isolated population to produce viable seed. For reasons we don’t have space to explore in this article, saving seeds from cucumbers, squash, corn and most plants in the Brassica family (kale, cabbage, broccoli) is best left for experienced farmers who have the space and knowledge to make sure those seeds have been bred in a way that maintains their genetic diversity and integrity. On a home scale, I recommend starting with the easy ones: lettuce, beets, carrots, celery, tomatoes, onions, beans and plants in the mint family (most of your culinary herbs.)
Maturity
Most of the vegetables we eat are just babies when we harvest them for the table. But to save seeds, let the plant mature completely. Heads of lettuce will elongate and shoot up flower stalks covered in tiny, yellow dandelion-like blooms. Onions will send up a pointy bud that will open up into a globular white cluster. Beets, carrots and celery are biennial, so their seeds won’t mature until the second year. Tomatoes and peppers, when harvested for seed, should be much riper than most of us prefer for fresh eating.
Harvest and Processing
There are two distinct types of seed processing: dry and wet.
Dry Processing
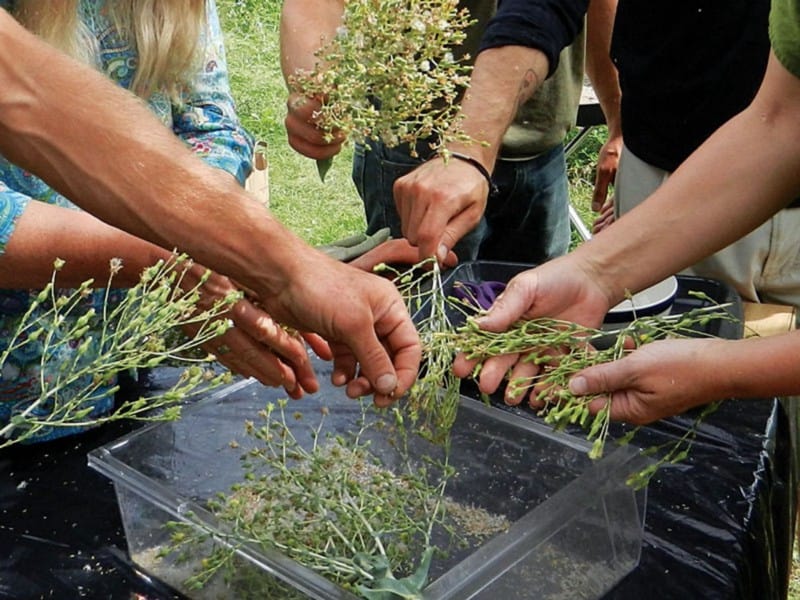
Make sure the seeds are fully formed and have started to dry. A good test is if they shake easily into your hand. If the seed is still very firmly attached to the plant, it probably hasn’t matured. When you harvest, don’t try to remove the individual seeds in the field. This can cause a lot of waste. Just cut the whole seed-head carefully into a paper sack and move to a sheltered spot where you can clean it.
As soon as you harvest, create detailed labels with as much information as you know. Include date of harvest, date of planting, species and variety names, where in the garden it grew best, where you originally got the seed, and why you liked this particular variety enough to save seed from it. Keep these notes with the seeds, and you will always have the information at your fingertips.
Most seeds mature within a protective coating called chaff. To process seeds for storage and replanting later, we must first remove the chaff; otherwise it will rot in storage and cause the seeds to decay. To remove the bulk of the chaff, pour the seed heads onto a clean tarp spread on the ground or a large table. Fold the seeds into the tarp like a burrito, making sure the corners won’t leak. Stomp, smash and dance on the tarp, and then carefully open it back up. Avoid getting a lot of dirt and other contaminants into the seeds.
Now you are ready for winnowing. On a large scale, this is best done with fans and screens, but on a small scale you can just do it with a medium-sized round bowl and your mouth. Put the seed into the bowl a little at a time and swirl it around, blowing gently. The chaff, which is lighter, will lift up and blow away, while the seed, heavy with genetic material, will sink. Pick the last few specks of chaff out with your fingers and place the clean seed on a piece of paper in a standard electric food dehydrator on the lowest setting (around 96 degrees) overnight. You could also dry your seed on a dark shelf for at least two weeks, but I prefer the dehydrator so I don’t have to worry about mice, ants and ambient moisture ruining my crop.

Wet Processing
If the seed is encased in a juicy fruit, such as tomatoes, use this method to remove the slimy seed coat so that the seeds last longer in storage. This not only gets rid of the slime, it also kills any seed-borne diseases and ensures your seed will survive in storage for up to several years.
Squish the seeds into a jar. Add a small amount of water, place a piece of cardboard over the top to let air in but keep bugs out, and set the jar aside. Pick a spot that is not in your kitchen, because it will definitely stink! Within a week, a thick skin of mold will form on top, and the mature seeds will sink to the bottom. Now, fill the container to the top with water and carefully pour off the mold on top. Rinse the seeds a few more times, until the water is clear, then strain them. Now they’re ready for the dehydrator.
Storage
Store seeds in a cool, dry, dark place. I store mine in paper envelopes inside insulated picnic coolers, available for a few dollars at any thrift store. If you save peas or fava beans, watch out for weevils, which are very common. You won’t be able to tell if your seed has the weevil larvae inside, but store them in the freezer and you can be sure they will die. Also freeze seeds from members of the Allium family, such as onions, leeks and chives, which are particularly short lived — they last much longer when frozen. The longevity and viability of your seeds will be largely dependent on storage conditions, so don’t overlook this important step.
Distribution
We can only protect diversity by keeping it alive, and your seeds will perish if stored for more than a few years. Grow and save them again, and share your collection with fellow gardeners. My favorite way to share seeds is through the community seed swap. To learn more about that, see my article on the topic.


